The lazy Sunday guide to sailing the serverless seas
Published on 2021-11-14
Summary
- Learn to harness Jib to quickly create container images.
- Deploy these to Lightsail (AWS' serverless solution) directly from the command line.
- Serve your API from a custom domain, over https.
- Wrap everything in the DDoS-proof bubblewrap Cloudflare offers.
Serverless solutions ought to be stocked on chemists' shelves, nestled between industrial tubs of aspirin and 1000-count packs of paracetamol – such is their power to prevent headaches. Before I further extoll the virtues of serverless allow me to preface this guide with the following caveats:
- If you're taking your first steps with web applications or devops, you're better off starting out with a VPS and learning the ropes that way.
- This guide is not one-size-fits-all. I have found success using these methods & technologies for prototypes and side projects. You may have to adapt these steps for your usecase.
Contents
Prerequisites
The following prerequisites should be fulfilled. Walking through them is beyond the scope of this document.
- You must have an Amazon Web Services account. A Cloudflare account is necessary if you wish to complete the optional step at the end of the guide.
- A basic RESTful API you wish to deploy. You may use any language or technology, but this tutorial assumes a Java project using Maven.
Setup
First, install the AWS CLI v2 . Configure your access key ID, secret key, and region by following these instructions . You will then want to install the lightsailctl plugin to enable the AWS CLI to interact with Lightsail services.
Lightsail's Container Service
A 'Container Service' in Lightsail is simply an environment into which you launch a specific containerised application. You can scale horizontally by adding up to 20 compute nodes within a single Container Service, and vertically by changing the 'Power' (instance type of the underlying VPS).
We will now create a Container Service, specifying we wish to populate it with a single micro node:
aws lightsail create-container-service \
    --service-name <YOUR-PROJECT> \
    --power micro --scale 1
Check that the service has been created:
aws lightsail get-container-services \
    --service-name=<YOUR-PROJECT>
aws lightsail get-container-services --service-name=<YOUR-PROJECT>Wait until this command reports that the state of the newly created Container Service is ACTIVE or READY.
Create the container image
We will now add a dollop of secret sauce, courtesy of Google's excellent Jib plugin. Jib has been a Copernican revolution in my container workflow for Maven projects. It is blazing fast — doing a much better job than Docker itself at only rebuilding the layers that have changed. It prides itself on generating reproducible builds and creating images directly from Maven or Gradle, meaning you can wave goodbye to writing Dockerfiles. I was initially skeptical upon hearing all this, but to try it is to love it.
If using Maven include Jib by adding the following to the build plugins element of your POM:
<build>
    <plugins>
        <plugin>
            <groupId>com.google.cloud.tools</groupId>
            <artifactId>jib-maven-plugin</artifactId>
            <version>3.2.1</version>
            <configuration>
                <from>
                    <image><BASE-IMAGE></image>
                </from>
                <to>
                    <image><YOUR-IMAGE-NAME></image>
                </to>
            </configuration>
        </plugin>
    </plugins>
</build>
Replace <BASE-IMAGE> above with a string identifying the base image you wish to use for your container in the format image-name:tag@digest. Since I wish to build upon the OpenJDK version of Java 17, that is eclipse-temurin:17-jre@sha256:8b7... for me.
Create the image containing your application by running:
./mvnw compile jib:dockerBuildSpin up a container
Let's push our newly minted image to the Container Service we created earlier:
aws lightsail push-container-image \
    --region eu-west-1 \
    --service-name <YOUR-PROJECT> \
    --label <YOUR-API-NAME> \
    --image <YOUR-IMAGE-NAME>:latest
Where <YOUR-API-NAME> is simply a label to identify this application within the context of the Container Service we created earlier.
Once the image has been pushed to Lightsail we can actually create a container and have it run in the cloud:
aws lightsail create-container-service-deployment \
    --service-name <YOUR-PROJECT> \
    --containers <CONTAINER-JSON> \
    --public-endpoint <ENDPOINT-JSON>
Where <CONTAINER-JSON> is an object with the following data:
{
    "<YOUR-API-NAME>": {
        "image": ":<YOUR-PROJECT>.<YOUR-API-NAME>.latest",
        "ports": { "8080": "HTTP" }
    }
}
And <ENDPOINT-JSON> takes the form:
'{"containerName": "<YOUR-API-NAME>", "containerPort": 8080}'You may monitor the deployment with:
aws lightsail get-container-services \
    --service-name=<YOUR-PROJECT> | grep "\"state\":"
The deployment is done once the Container Service reports the state of the container as RUNNING.
This last command will also report a URL that is a subdomain of .<AWS-REGION>. Open it in a browser and you will see whatever the container is serving on port 8080 (or whichever ports you specified in the port mapping in <CONTAINER-JSON>).
Serving from a custom domain
The container deployment is complete, but we may wish to gild the lily by serving our API from a domain that belongs to us rather than the default Lightsail one. For illustrative purposes this guide will suppose we want to expose the API on the subdomain api.example.com.
I will be using Cloudflare to do this (and benefit from their excellent DDoS protection & analytics) but the steps can be replicated with any other DNS provider.
The ergonomics of generating certificates using the AWS CLI aren't as smooth as those of previous steps, so we will instead access the Lightsail console via the browser.
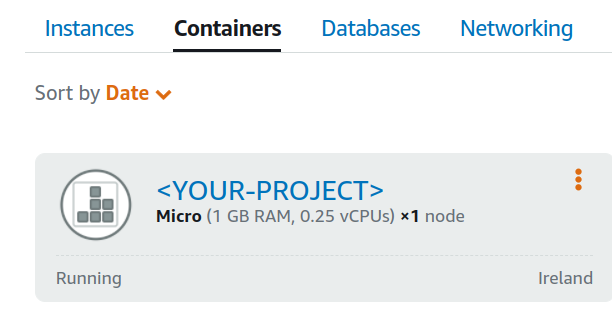
Log in to Lightsail and navigate to the 'Containers' tab:

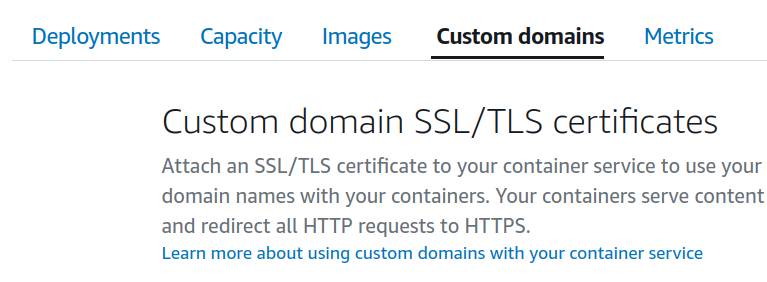
Click on your project and within the project's Container Service navigate to the 'Custom domains' tab:

Click 'Create certificate' and enter api.example.com as the Primary Domain when prompted. Create the certificate and details for a CNAME record will appear:

Before we can use this certificate we must validate it. Switch over to Cloudflare, click on the management panel for the domain you wish to use, and access its DNS options. Here, add a CNAME record with the above information. It is unnecessary to proxy it via Cloudflare, so leave the 'orange cloud' toggle off.
Once this is done go back to the 'Custom domains' tab in Lightsail and confirm that its status says 'Valid' (you may have to wait a bit for DNS propagation).
Once validated, attach the certificate to your running container by clicking 'Attach certificate' and following the instructions.
Return one last time to Cloudflare's DNS control panel. Add another CNAME record with a Name of api (or whichever subdomain you wish to serve responses from) and a Value that is the .<AWS-REGION> subdomain reported by the Container Service when we spun up our container earlier. Switch the 'orange cloud' toggle for this record on, proxying requests to api.example.com through Cloudflare.
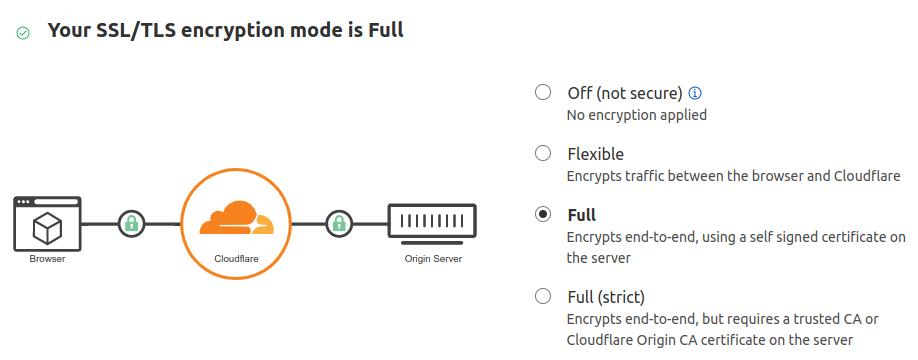
Finally, navigate to the 'SSL/TLS' console for your domain on Cloudflare and set the mode to Full or Full (strict). This ensures our API is always served over https and helps us avoid the TOO_MANY_REDIRECTS misconfiguration error.

You have now:
- Packaged your Maven project as a Docker image without having to write a Dockerfile.
- Deployed your API as a serverless service (at a flat monthly rate and easily scaled to meet demand).
- Served it on a custom domain with full TLS.
- Protected it from DDoS attacks with Cloudflare.
I hope you found this guide useful. Feel free to reach out with any feedback or comments.
Main image made by remixing Bootstrap Icons (MIT license).
Dropcap background: Indian pattern (ca. 1868-70) by William Morris, licensed under CC0.